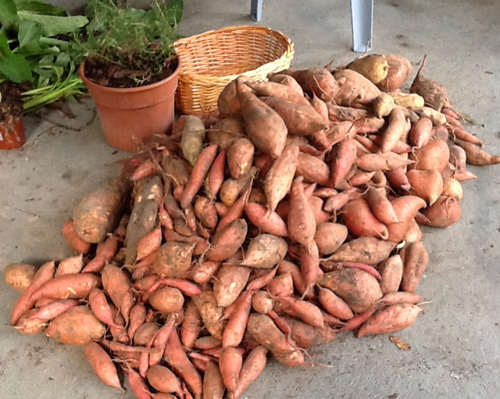
Sweet potato (Ipomea batatas), locally known as “kamote”, is commonly planted in flat to slightly rolling open areas. The crop is also known to be a cheap but excellent source of carbohydrates, vitamin A, carotene, calcium, and phosphorus. It is also a fair source of thiamine and iron but a poor source of riboflavin, niacin, and vitamin C.
A versatile crop, sweet potato has multifarious uses. It is not only grown as a food substitute for rice and corn but also as a potential source of raw materials for industrial uses and food delicacies. Sweet potato is being processes into feeds, flour starch, and pectin for local and export markets. The flour is further processed into fermented products such as, soy sauce and alcohol. When freshly cooked it can be saccharified to produce wine, vinegar, and nata.

SOIL AND CLIMATE REQUIREMENTS
Sweet potato can be grown in a wide range of soils, from heavy to sandy. It thrives best in sandy loam soils rich in organic matter with pH ranging from 5.0-7.0 and in areas with uniform rainfall and good drainage.
The crop can be planted throughout the year but the ideal planting time for best varieties is at the onset of the rainy season or immediately after the rainy season when soil is still moist.
VARIETIES
Choosing the kind of variety to plant is dependent on the purpose for which it is grown. Following are 14 varieties recommended by the Philippine Seed Board. These varieties have inherent characteristics such as, high yield, resistant to pest and diseases, improved nutritional quality, short maturing, and many other desirable characteristics.
Moreover, the varieties recommended for starch processing are those relatively high in starch content.
CULTURAL REQUIREMENTS
LAND PREPARATION
To have good root yield of the crop, plow and harrow the soil twice or until soil is loose and friable. Form ridges or furrows of about 30-40 centimeters high by using a carabao-drawn mold-board plow or tractor-drawn disc plow with a distance of about 75-100 cms between ridges.
PLANTING MATERIALS
Use sprouts from roots of previous crop or vine tip cuttings from healthy plants 25 cm long. However, for economic reasons, tip or terminal vine cuttings immediately or you can store them in shaded place but they should be planted within 2 days from the time they are cut.
PLANTING
Plant vine cuttings diagonally on top of ridges during the rainy season to prevent the crop from being soaked under water, or in the furrows during dry season so that moisture reserve in the soil can be utilized by the crop. Expose 2-3 leaves at the tip at a distance of 25 cms between hills. One cutting per hill is equivalent to 33,000 hills per
hectare.
FERTILIZATION
Follow the fertilizer recommendation based on the results of the soil analysis. If not available, follow the following general recommendations:
1. For poor soil, use 4-6 bags complete fertilizer per hectare;
2. For moderately fertile soil, use 4 bags complete fertilizer per hectare;
3. for fertile soil, fertilization is not advisable.
Apply fertilizer at planting time at 8-10 cms from the base of the plant or broadcast in the furrows and cover subsequently with soil. The use of compost or organic fertilizers at 3 tons per hectare is highly recommended.
CULTIVATION AND WEEDING
If weeds are abundant, shallow cultivation is done 10-12 days after planting. Tilling up cultivation is done at 25-30 days after planting. This is to provide enough soil to cover the developing roots and thus, minimize the entry of weevils that may attack the growing roots.
PEST AND DISEASE MANAGEMENT
Foliar spraying of fevinthrothion at 0.5% one (1) month after planting and twice, at 50 days and 70 days after planting (DAP).
HARVESTING
Most of the recommended varieties are ready for the harvest 110-130 days after planting (DAP). Harvesting can be determined by root sampling and if desired size has been attained, harvesting can be done anytime.
Before harvesting, cut and roll the vines like a mat, fork, hoe or, pass a plow below the ridges, then hand pick the roots. Handle the roots carefully to minimize injury. Sort out damaged or bruise roots from undamaged ones.
POST-HARVEST DISEASES
POST-HARVEST OPERATION
If possible, use wooden crates for containers instead of gunny sacks to avoid skin damage during handling and transport. Harvest roots, if properly cured, can be stored even for 3 months by keeping them under room temperature of 115oF or 32oC with a relative humidity of 92-95%.
PROCESSING OF SWEET POTATO CHIPS
Chipping or cutting sweet potato roots into thin slices should be done to facilitate efficient drying, handling and storage, and to avoid jamming the grinding machine during feed milling operations. The desired size of chips should not exceed 1.5 cm thick and 10 cm long.
THERE ARE TWO METHODS OF CHIPPING SWEET POTATO ROOTS:
1. Manual chipping or slicing by means of cutting knives or “bolo”
2. Mechanical chipping by means of chopping machines operated manually or by engine.
Manual chipping is suited for small-scale operation (less than half a hectare yield). However, for huge volume of roots (more than one hectare yield), mechanical chipping is necessary.
An example of a mechanical chipper is the one developed by the Bureau of Plant Industry. The BPI rootcrop chipper has a rated capacity of 0.3 tons per hour when pedal operated and 1.5 tons per hour when operated by a 3-horse power gasoline engine.
It cutting blades are mounted on a vertical disk located opposite a feed hopper. These blades are adjustable, allowing roots to be chopped to desired thickness, from 5 mm to 20 mm thick, and from 100 mm to 180 mm long.
DRYING
Dry sweet potato chips to 12-13% moisture content through sun-drying or artificial heat drying.
SUN-DRYING – spread chips uniformly in mat or concrete floor. Expose directly under the sun for 2-3 sunny days. Turn chips periodically to facilitate efficient drying. Drying period depends on the availability of sunlight and size and thickness of chips.
ARTIFICIAL HEAT DRYING – This is utilized in the absence of sufficient sunlight. Recommended drying facilities:
1. STATIC-BED DYERS – All commercial batch dryers, e.g. storage, bin, tray and through-circulation dryers, used for wheat, rice, corn and similar products may be used for drying sweet potato chips.
2. MOVING-BED DRYERS – These are similar to static-beds except that the bed moves either continuously or intermittently from one end to another. This allows continuous feeding of wet material from one end and continuous withdrawal of dried product from the other.
3. NATURAL CONVECTION TYPE DRYER OR IMPROVED “TAPAHAN” – This utilizes a wide variety or combustible fuel, such as wood and coconut husk. Fuel is burned inside a steel tube made of three oil barrels welded together. This tube lies at the bottom of the pit covered by a perforated metal drying platform. Air entering the bottom of the pit is warmed by heat radiating from the barrel’s surface and rises up through the drying platform and layer of materials to be dried. Flue gas and other products of combustion are released above the drying platform thru a chimney coming from the end of steel tube or combustion chamber. To increase its capacity, provide up to 10 layers of tray or drying platform above the steel tube or combustion chamber.
RELATED: Value-added Products from Sweet Potato & Its Recipes
Source: Plant Industry Production Guide on Sweet Potato, BPI Sweet Potato Commodity Profile
DA-Eastern Visayas Integrated Agricultural research Center


sino po author nito?