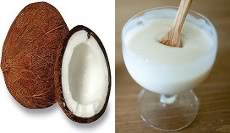
Coconut milk yogurt or coco yogurt, made from coconut milk and yogurt starter culture, offers a good alternative for people who love to eat yogurt but can’t tolerate dairy products and those with food allergies.

Production Process of Coconut Yogurt
Preparing: To make coco yogurt, starter culture must first be prepared. To do this, a 10 percent solution of non-fat dry milk (NFDM) is autoclaved for 10 minutes at 10 psi (pounds per square inch), cooled, and divided in half- one half is inoculated with Streptococcus thermophilus and incubated for 14 hours at 38 degrees Celsius, and the other half with Lactobacillus bulgaricus and incubated for 15 hours at 42 degrees Celsius. The starter may be stored at five degrees Celsius until use.
Making Coconut Milk Yogurt with a Thermophilic (heated) Yogurt Culture
Ingredients:
– 3-4 cups Coconut Milk (approximately two cans)
– Thickening Agent*, choose one:
- 3 tablespoons Tapioca Starch (or Tapioca Flour) OR
- 1-2 teaspoons Gelatin
– Yogurt Starter, choose one:
- 1/8 teaspoon Direct-set Yogurt Starter such as Traditional-flavored, Mild-flavored, Vegetal, OR
- 3 tablespoons Heirloom-style Yogurt Starter such as Greek or Bulgarian varieties**, OR
- 3 tablespoons Yogurt containing live active cultures purchased from the grocery store (ideally use an unflavored variety)
Procedure:
1. Heat the coconut milk to approximately 115°. As the milk cools to 110°, mix in the thickening agent of your choice. If adding tapioca starch or flour, whisk the starch into a small amount of milk and then mix that portion of milk into the larger portion of milk and mix well to combine. If adding gelatin, sprinkle the gelatin into the milk and mix well.
2. Once the milk has reached 110°, add the yogurt starter and mix well to combine.
3. Incubate the mixture at 108° to 112° for 8 to 24 hours. Please note, coconut milk generally takes a few hours longer to culture than when making yogurt with animal-based milk products. If a more sour yogurt is desired, use a longer culturing period. While a yogurt maker is generally the easiest way to culture thermophilic varieties of yogurt, if you do not own a yogurt maker, here are a few alternative ways to keep the yogurt at the right temperature:
- Wrap the jar in a dishtowel and put it in an insulated cooler with the cover on.
- Make an insulated incubator out of a small crock pot by lining it with foam. Put the jar of yogurt inside, put a piece of foam on top, and put the lid on.
- Turn on the light in an electric oven, then put wrap the yogurt in a dishtowel and put it inside the oven.
- Set the yogurt inside a food dehydrator that has the trays taken out, and that is set for no higher than 110 degrees.
Once the yogurt has set (solidified), allow the yogurt to cool for an hour or two until it reaches room temperature. Place the yogurt in the fridge for 6+ hours to halt the culturing process. The yogurt will also thicken further as it chills.
Sources: foodmarketexchange.com, culturesforhealth.com

Applicant attention.
2015-2016 loan investment offer 3% rate only. I am Mr Adams Kevin a
representative of A.K.L.M insurance company, Email:(adams.credi@gmail.com)
*Personal loan.
* Business loan.
* Investment Loan.
* Home loan.
* Student loan.
* Investment loan.
Here is a chance for you to urgently loan from Mr Adams Kevin loan investment. Contact Email: (adams.credi@gmail.com) for
urgent loan information
Application is out 2015.
Email: adams.credi@gmail.com
Tell: +187499384874