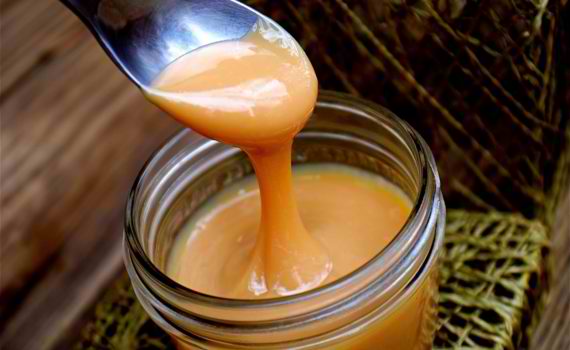
How to make yema spread the easy way!
This homemade yema spread is a perfect partner for your bread and pastries or with fruits. This also makes a good business idea to start for anyone looking for an extra income. Try this yema spread recipes.

Yema Spread By Kusina Chef
Ingredients:
306 ml Condensed milk
5 egg yolks
155 ml evaporated milk
1/8 cup butter or margarine
1 tsp calamansi juice or lemon juice
1/2 tsp vanilla extract
Procedure:
1) in a pan combine condensed milk, evaporated milk, calamansi juice and vanilla extract.
2) Mix until well combined
3) Cook over low heat and stir constantly. Cook for 45-50 minutes or until the texture is smooth and thick.
4) When the mixture is smooth and thick turn the heat off and add the butter. Mix until melted and blended to the mixture.
5) Set aside and let it cool completely
6) When it is completely cooled transfer the Yema spread into the sterilized jar.
7) Best Served with bread, biscuits, graham crakers or sponge cake.
In this recipe I made 1 medium sized jar and 1 small sized jar. If you want to make big batches of Yema Spread you can just double the recipe.
You can sell this for P60-P80 for the small sized jar and P120-P140 for the medium sized jar. But you have to make a detailed costing because the prices of the other brands are different.
Some are expensive and some are cheap. For this recipe I used F&N condensed milk. I bought mine for P27. It is not too sweet but you can also use Doreen and Jersey condensed milk.
The slighly pricey brands but really sweet are Liberty, Carnation and Milkmaid. You can improve this recipe just add or remove some of the ingredients. And you can add other flavor like ube, Chocolate or Cheese.
Just be sure that the product will not be spoiled.
The shelf life is 1 week or 1 month if you store it inside the fridge(chiller). The lemon juice acts as a natural preservative. Ways to prevent food from spoiling are to make sure that all the utensils that you are using should be clean.
Jars should be sterilize especially if you will make this for business. You can seal your jars using shrinkable film and a heat gun.
How to Make Dulce de Leche by Gemma Stafford
Ingredients
1 can sweetened condensed milk
Instructions
1. Remove the label from the can of condensed milk. It is no longer needed! If you leave it on, you’ll get a papery mess in the water.
2. Place the can in a small pot and fill it with enough water to come up to one inch (2.5cm) from the top of the can. You will need to add more water during the cooking process to make sure water doesn’t go below this level as it evaporates. Don’t let the water come higher than ½ inch (1.25cm) from the top of can, though, as you don’t want any getting on the top of the can and going into the holes you pierced.
3. To prevent the can from rattling in the water (which can be annoying when you consider that it’ll need to be in there for several hours) put a rag under the can.
4. Place the pot on your stove and turn it on to medium-high heat.
5. Watch the water closely until you see the water come to a simmer.
6. Lower the heat to hold the water at a simmer. A soft Dulce de leche takes about 2½ hours.
7. Remove the can with tongs or an oven mitt and place on a rack to cool. Be careful when emptying the contents, as you can get burned.
8. Open the can carefully with a can opener and pour into a bowl. The top will be more fluid, and there will be thicker, darker chunks at the bottom which will need to be scraped out. When everything is in the bowl, whisk together to make it homogeneous.
Notes
The leftover dulce de leche will keep for a couple of weeks, refrigerated. It would be great stirred into coffee or cocoa, spread on toast, or warmed and drizzled on ice cream. Try it with peanut butter on a sandwich (surely the top trade at the school lunch table).
