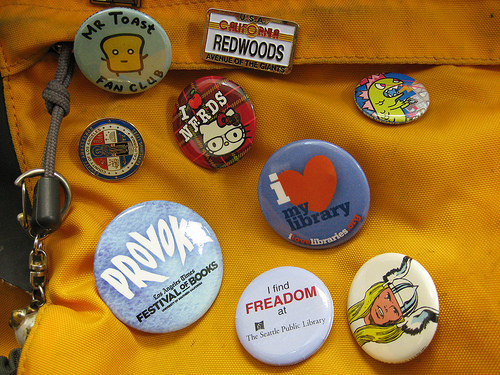
Making button pins is great for craft project for kids of all ages. They make excellent gifts and are a handy way to promote your favorite causes and candidates. Making your own button pin isn’t complicated if you invest in a hand-press button making machine and buy some basic supplies.

How to Start a Button Pin Business
The Market
* Seasonal and Holiday Crafts. If you are looking for a hobby or project, button craft ideas are fun for people of all ages.
* Schools. Teachers, administrators, PTA/PTO members and students have tons of uses for buttons!
* Fund-raising. Anyone can create professional-quality buttons and sell them to raise funds!
* Churches. Member families, pastors, and youth leaders will have fun making buttons for any occasion.
* Business Promotions. Large or small, all businesses can benefit from using buttons to promote, to motivate and even to sell!
* Groups and Organizations. Groups that work together to achieve goals can use buttons to raise awareness and funds for their efforts.
* Be Your Own Boss. Turn a fun hobby like button-making into a profitable business!
The Business
Especially with the upcoming May elections, button pins make excellent campaign materials. But even minus the election fever, a growing market has been riding on the button pin wave, such as graphic artists and teenagers that use them as accessories. They also serve as affordable gift items, sometimes with mirrors or pins as their back covers.
Aside from its market potential, the button pin business can be launched with ease because of minimal cash outlay, plus it doesn’t require you to lease any commercial space. The button pin press set and 2.25? mold costs P11,000, while the 2.25? desktop cutter costs P6,000.
The typical size for a button pin is 2.25? but, if one would want to offer other sizes, other molds are available from P4,000 to P6,000. These molds are made from heavy duty solid stainless metal. Setting up this business also requires a computer and a printer.
Materials and equipments needed:
Button pin press
Button pin set including metal plate
Mylar film and back cover that can be either bottle opener with magnet
Pin badge
Mirror keychain, or clip badge
Inkjet paper
Procedure
Design your button pin. On a sheet of paper, come up with a design that will fit on the button you want to make. A great way to provide multiple copies of design is to either design your button on your computer or draw your design and then scan the image into a computer.
Print out your design. You can print out multiple copies of the same image on one sheet of paper by copying and pasting your image into a Microsoft Word document multiple times, or by setting your printer options to “tile” the printed image as many times as it can fit onto a single sheet of paper.
Cut out the button designs. If you want a perfectly cut circle you can use a circle punch when you buy the button making machine, but if you want to do it by hand use the button template that came with your blank buttons and trace a circle around the edge of your printed image and then cut the image out.
Cost/Profit Computation
Computing the cost per pin is easy once you have computed the cost of the ink. In Ronrox Corp., they estimated that a full-page print consumes about 1/2ml per color of ink, which will still depend if other colors are used.
Meanwhile, the price of ink is P100 per 100ml. Let’s say the print uses four basic colors so that would mean 2ml of ink per page. Per page, you can lay out 11 circular images, so that means 11 pins.
To get the production cost for 11 pins you can use the following calculation for guidance:
P2.0 (2ml ink)
P1.50 (inkjet paper)
P44 (11 pcs of pin badge)
P47.50 for 11 pins or P4.32 per pin
Depending on your market, you can charge anywhere from P8 to P10 (wholesale) or P35 to P40 for personalized designs.
Tips:
* Inkjet paper is used instead of regular bond paper to avoid smears and smudging. This type of paper is coated and acts like a photo paper.
* Back covers are always positioned less than 10 degrees with the position of the image, or should be tilted to the left so that the pin or clip would affix correctly with the image. This is because the mold moves around when pressed.
* Make sure to press the machine firmly when attaching the back cover.
* Button pins can also be laminated if customers prefer a matte or scratch-free glossy finish. But, if laminated, the mylar film should be removed and the process employed should be cold lamination.
This button pin business and ID and Badge Printing Business makes a good business combination.
For equipment and materials, contact:
Ronrox Corporation
Unit-16 Grace Park Commercial Complex
J. Teodoro St., 4th Ave., West, Caloocan City
Telephone: (02) 994-0749; (02) 497-5950
E-mail: ronrox_mktg@yahoo.com
Website: www.ronrox.com.ph
sources: ehow.com, entrepreneur.com.ph
