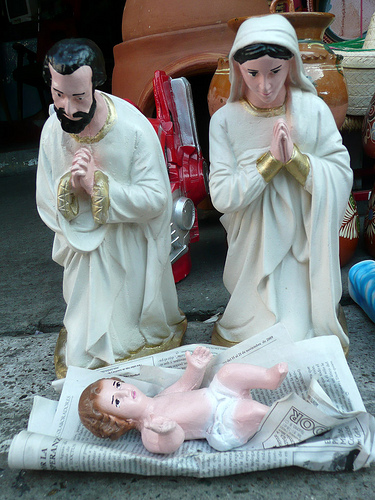
Nativity set figurine is fun and easy to make and also a good business idea if you want to make extra income this Christmas season. Learn how to make a mold and support for the nativity set. For this, you will use a 2-piece mold.

Molding of nativity set
Materials and Tools:
about 4 1/2″ model of nativity set
modeling clay molded to a width of 1 1/2″
500g silicone rubber or RTV
25g catalyst for silicone rubber
about 2kg plaster of Paris*
about 600g water*
cardboard
masking tape
3g mold release agent or petroleum jelly
2 rubber bands (about 1/2″ x 24″)
spatula
mixing bowl
small knife
modeling tools
*Add amount if model is larger
Procedure
A. Preparation:
1. Coat the sides of the model with modeling clay. Make sure the front and back of the model are divided equally. Apply clay to the holes between the back and front of the model. Pack well to ensure that the details of the figurine are properly reproduced on the clay.
2. Smoothen the clay by means of a knife or any appropriate modeling tool. Scrape off excess clay.
3. Using a round-tipped object like the handle of a paint brush, gently prick the sides of the clay to make shallow holes. These holes are intended for the locks of the rubber mold.
Now that one half of the model is covered with clay, make the other half of the silicone rubber mold.
B. Making the First Half (front) of the Model:
1. Apply thinly the mold release agent or petroleum jelly to the exposed part of the model including the clay base. Wipe the surface with a dry cloth to ensure that the release agent is evenly spread.
2. Pour 250g silicone rubber or RTV into the mixing bowl.
3. Add 12.5g catalyst to the silicone rubber. Mix well.
4. Apply thinly the mixture to the front portion of the model until the model is fully covered. Apply the remaining mixture. Let the silicone rubber mixture dry for 30 minutes.
C. Making the Support:
1. Put a cardboard walling around the model making sure that the height of the cardboard is higher than the highest point of the model. Fasten with masking tape.
2. Pour sufficient amount of water or about 300g into the mixing bowl. Add 1kg plaster of Paris to make a mixture with the consistency or viscosity of condensed milk. Mix well with the spatula.
3. Apply the creamy mixture to the surface of the dried silicone rubber mold. Apply to all parts until the support is formed.
4. Let dry for 25 minutes.
Casting and Finishing the nativity set
In this section, you will learn the techniques of casting and finishing the 2-piece mold.
Materials and Tools:
500g resin
12g catalyst for resin
88g styrene monomer to serve as resin thinner
18g cobalt
100g China talc (to be mixed with the resin)
18g stop sag
100g dyes or toners (flesh, yellow, pink, white, green, dark green, brown)
paint brush
sandpaper
mixing bowl
spatula
rubber band
Reminder: Always mix the accelerator (cobalt) into the resin first and mix thoroughly before you introduce hardener into the mixture. NEVER mix raw accelerator and hardener – it will BURN SPONTANEOUSLY!
Procedure
A. Casting:
1. In a bowl, mix resin and a small amount of China talc. The amount of resin depends on the size of the figurine. You will need 500g of resin to fill the 4 1/2 inch nativity set mold you have just made.
2. Add stop sag to regulate the flow of the resin. Mix well.
3. Add styrene monomer. This will make the mixture less viscous and allow it to easily flow into and fill all corners of the mold.
4. Add a small amount of cobalt to hasten hardening and drying of the casting material.
5. To further speed up hardening of the casting material, add catalyst. The casting material is now ready.
6. With a spatula, apply casting material to one of the two halves of the mold. Use paint brush for finer application. Do the same with the other half of the mold.
7. Apply casting material to every detail of the mold so that all parts of the figurine will be cast.
8. Fit the molds together with the support and tie with rubber band. Tie tightly to keep the molds in place.
9. Dry the molds for 15-20 minutes.
10. When dry, separate the support and molds. Take out the formed cast.
11. Using a knife, scrape off excess cast at the sides of the dry figurine. Polish with a piece of sandpaper.
B. Finishing:
You will need a paint brush and paints or dyes of different colors for finishing. Apply the paints as follows:
– Flesh color for the face of Joseph, Mary and the infant Jesus.
– Yellow top provide contrast to the various parts of the manger.
– Pink and white for the robe of Mary and the crib.
– Green for the robe of Jesus.
– Dark green for the shawl of Mary and some parts of Joseph’s robe. Brown for the hair and features of the face, and also for the back of the manger and its surroundings.
Let paint dry after each application.
For supplies and materials:
Polymer Products (Phil.) Inc.
11 Joe Borris St., Bo Bagong Ilog, Pasig City
Tel: 671-9837 to 39
Email: info@polymerprod.com
source: trc.gov.ph
